Materials7 min readAuthorMass Loaded Vinyl DirectPublishedUpdated

    The Role of Decoupling Materials in a Soundproof Wall Assembly

    Cross-section cutaway of a soundproof wall assembly showing resilient channel, rubber isolation clips, mass loaded vinyl, and drywall layers between wood studs
    Cross-section cutaway of a soundproof wall assembly showing resilient channel, rubber isolation clips, mass loaded vinyl, and drywall layers between wood studs

    1What Decoupling Means in Soundproofing

    In acoustic engineering, decoupling means mechanically isolating two surfaces so that vibration in one does not directly transfer to the other. In a wall assembly, that means separating the drywall layer from the stud framing using a resilient intermediary — a material that absorbs vibrational energy instead of passing it through.
    Sound travels through solid materials far more efficiently than through air. A wood stud connecting drywall on both sides of a wall creates what acousticians call a "structure-borne transmission path." Vibration from a television speaker, a voice, or bass from a stereo hits the drywall on one side, travels into the stud, crosses the wall cavity, and radiates out the drywall on the other side. The stud acts like a bridge — and no amount of insulation in the cavity fully compensates for it.
    Decoupling removes the bridge. By mounting the drywall on a resilient intermediary rather than directly on the stud, you force the vibrational energy to cross an air gap or pass through a damping material — both of which dramatically reduce the energy that reaches the other side.

    2Why Decoupling Matters More Than Adding Mass Alone

    The Mass Law of acoustics states that doubling the mass of a barrier increases its STC rating by approximately 6 points. So adding a second layer of 5/8" drywall to a standard wall (from one layer to two) should theoretically add about STC 6. In practice, you typically get STC 3-5 because the rigid connection to the studs transfers so much vibrational energy.
    Decoupling changes the math entirely. A single layer of 5/8" drywall on resilient channel — with no additional mass — can add STC 8-12 compared to the same drywall screwed directly to studs. Sound isolation clips with hat channel can add STC 12-20. The decoupling itself outperforms doubling the drywall mass.
    This is why experienced acousticians prioritize decoupling before mass. The optimal approach uses both — decouple first, then add mass to the decoupled layer — but if budget forces a choice, decoupling typically delivers more bang per dollar than additional drywall layers.

    3The 4 Main Decoupling Materials

    1. Resilient Channel (RC-1)

    Resilient channel is a thin, spring-steel metal strip that screws to studs horizontally, with drywall then screwed to the channel — not the studs. The channel's flexible profile allows it to flex slightly under vibration, absorbing energy rather than transmitting it directly.
    STC improvement: +5 to +8 over direct-mount assembly
    Cost: $0.50-1.50 per linear foot
    Installation: Screw to studs every 24 inches on center, horizontally. Drywall screws go into the channel only — never into the stud behind it
    Best for: Budget-friendly residential projects where moderate improvement is acceptable

    2. Sound Isolation Clips (e.g., RSIC-1, WhisperClip)

    Sound isolation clips are rubber-bushed mounting brackets that attach to studs and hold a hat channel (furring strip) away from the framing. The rubber isolator absorbs vibration before it reaches the hat channel and drywall. These are the highest-performing decoupling option available for standard wall construction.
    STC improvement: +12 to +20 over direct-mount assembly
    Cost: $3-6 per clip (spaced 24-48 inches on center) plus hat channel at $1-2/linear foot
    Installation: Clip to studs at specified spacing, snap hat channel into clips, screw drywall to hat channel only
    Best for: Home studios, home theaters, shared walls in multifamily, any application requiring serious sound isolation

    3. Staggered Stud Walls

    A staggered stud wall uses a wider top and bottom plate (2×6) with alternating 2×4 studs offset so that no single stud touches both drywall surfaces. Each side of the wall is connected to its own set of studs — creating a mechanical break in the vibration path.
    STC improvement: +10 to +15 over standard single-stud wall
    Cost: Additional framing lumber ($50-150 per wall) plus wider plates
    Installation: Frame with 2×6 plates; alternate studs at 12-inch spacing, each stud touching only one side's drywall
    Best for: New construction where wall depth is not a constraint; cost-effective for long walls

    4. Double Stud Walls

    The most extreme decoupling method: two completely independent stud walls with an air gap between them. No structural element connects the two sides. This eliminates structure-borne transmission almost entirely.
    STC improvement: +20 to +30 over standard single-stud wall
    Cost: Double the framing material, plus lost floor space (total wall depth 8-12 inches)
    Installation: Build two separate 2×4 walls with a 1-2 inch air gap between them; no mechanical connections
    Best for: Professional recording studios, home theaters with high-powered subwoofers, extreme isolation requirements

    4Performance Comparison Table

    Decoupling MethodSTC GainCost (per 8ft wall)Wall Depth AddedDIY Difficulty
    Resilient Channel+5 to +8$15-40~0.5"Moderate
    Sound Isolation Clips+12 to +20$60-150~1.5"Moderate
    Staggered Studs+10 to +15$50-150~2"Advanced
    Double Stud Wall+20 to +30$150-4004-6"Advanced
    Key takeaway: Sound isolation clips offer the best performance-to-space ratio. They deliver near-double-stud performance while adding only about 1.5 inches of wall depth — making them the preferred choice for retrofits and renovations where space is limited.

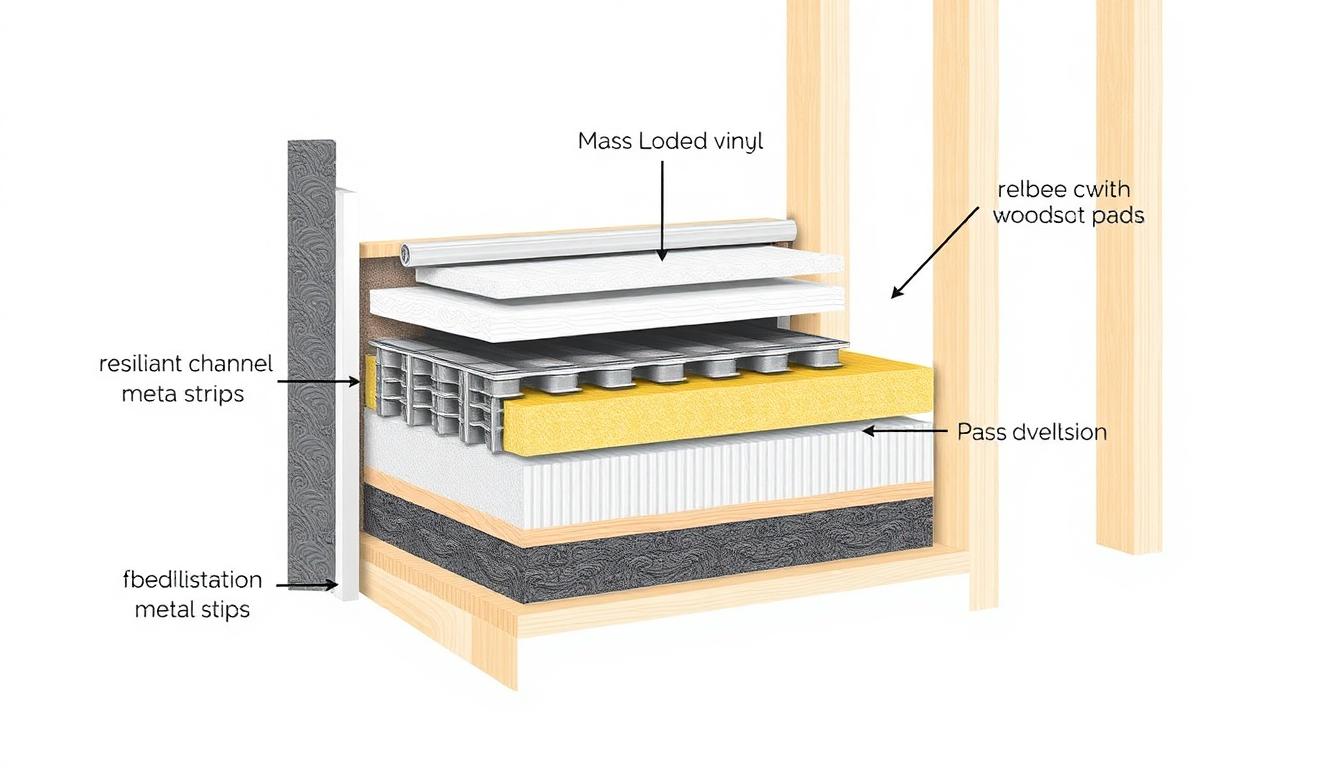
    5How Decoupling Fits Into a Complete Wall Assembly

    Decoupling is most effective when combined with mass and absorption in a layered assembly. The industry-standard high-performance wall follows this sequence from one room to the other:
    Layer 1: Finished drywall (5/8" Type X) — the room-facing surface
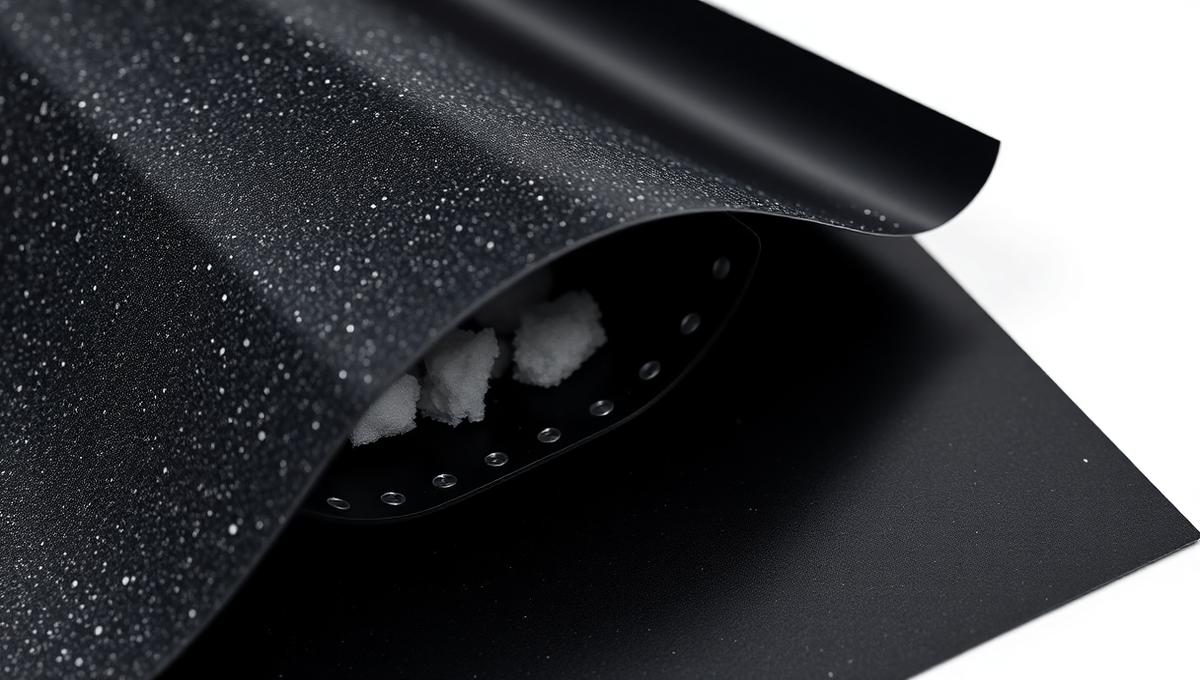
    Layer 2: Mass loaded vinyl (1 lb or 2 lb/sq ft) — adds dense, limp mass that damps vibration
    Layer 3: Decoupling element (clips + hat channel or resilient channel) — breaks the vibration path
    Layer 4: Stud framing with cavity insulation (mineral wool or fiberglass) — absorbs airborne sound within the cavity
    Layer 5: Second drywall layer (5/8" Type X) — the other room's surface
    This assembly — often called a "clip and channel" wall — routinely achieves STC 55-65 depending on the specific products and installation quality. Compare that to a standard interior wall at STC 33-38. The decoupling layer is responsible for the largest single portion of that improvement.
    The order matters. MLV goes between the drywall and the decoupling element — not stapled to the studs. When MLV is attached directly to studs, it becomes part of the rigid structure and loses its effectiveness as a limp-mass damper. Sandwiched between the decoupled drywall and the clips, it adds mass without creating a new vibration bridge.

    6Common Decoupling Mistakes That Kill Performance

    1. Short-circuiting with screws: The single most common mistake. If even one drywall screw passes through the resilient channel or hat channel and bites into the stud behind it, the decoupling is short-circuited — that screw becomes a direct vibration path that bypasses the entire isolation system. Use the correct screw length (typically 1" for single-layer drywall on hat channel) and never use screws long enough to reach the studs.
    2. Using the wrong resilient channel: Not all resilient channel is created equal. True RC-1 channel has a specific spring-steel profile designed to flex. Cheap knockoffs that are too rigid provide little actual decoupling. If you can't flex the channel with moderate hand pressure, it's too stiff.
    3. Overloading resilient channel: Resilient channel is designed for a single layer of 5/8" drywall. Adding two layers of drywall directly to resilient channel overloads it — the excess weight compresses the channel against the studs, eliminating the air gap and destroying the decoupling effect. If you need double drywall, use sound isolation clips rated for the higher weight.
    4. Forgetting flanking paths: A perfectly decoupled wall means nothing if sound travels around it — through the floor, ceiling, electrical outlets, HVAC ducts, or the gap under the door. Decoupling addresses the wall assembly only. You must seal perimeter gaps with acoustic sealant and address all flanking paths for the decoupling to perform as rated.
    5. Skipping cavity insulation: Decoupling reduces structure-borne transmission, but airborne sound still passes through the cavity. Without mineral wool or fiberglass insulation filling the stud bays, airborne frequencies resonate in the empty cavity like a drum. Always insulate the cavity — even friction-fit batts make a significant difference.

    7When Decoupling Alone Is Not Enough

    Decoupling dramatically reduces mid and high-frequency sound transmission, but bass frequencies (below 125 Hz) are harder to isolate because their long wavelengths couple with large structural surfaces. For bass-heavy applications — home theaters with subwoofers, music studios, or spaces near mechanical equipment — decoupling must be combined with significant mass.
    This is where mass loaded vinyl (MLV) becomes essential. MLV adds dense, limp mass to the assembly without adding rigidity. A 1 lb/sq ft MLV layer combined with clip-and-channel decoupling creates a system that addresses both structure-borne vibration (via decoupling) and airborne transmission (via mass). The combination is far more effective than either approach alone.
    For extreme low-frequency isolation (recording studios, home theaters with 20 Hz subwoofer response), a double stud wall with MLV on both sides, cavity insulation, and triple-layer drywall on isolation clips is the gold standard. These assemblies achieve STC 65+ and provide meaningful attenuation down to 40-50 Hz.
    The bottom line: decoupling is not optional in serious soundproofing. It is the single technique that separates amateur "add more drywall" approaches from professional assemblies that actually work. Start with decoupling, add mass with MLV, fill the cavity with insulation, and seal every gap. That sequence — in that order of priority — delivers the most cost-effective sound isolation possible.

    9Conclusion

    Decoupling materials break the vibration highway between rooms. Resilient channel offers budget-friendly improvement at STC +5-8. Sound isolation clips deliver professional-grade performance at STC +12-20 without consuming excessive wall depth. Staggered and double stud walls provide maximum isolation for new construction. The key is combining decoupling with mass (MLV) and absorption (cavity insulation) — and avoiding the critical mistakes that short-circuit the system. If you take one lesson from this guide, make it this: a decoupled wall with a single layer of drywall outperforms a direct-mount wall with three layers. Technique beats brute force every time.

    FAQs: Decoupling Materials Soundproofing

    Need Expert Soundproofing Advice?

    Our team of soundproofing specialists is here to help you choose the right products and installation methods for your museum or gallery project.